ConstraintSet을 사용하면 두 레이아웃 사이의 크기와 위치 변화를 애니메이션으로 표현할 수 있다. 이 아이디어를 확장한 MotionLayout으로 복잡한 화면 전환을 XML에 선언하는 방법을 살펴본다.
아직 ConstraintSet을 사용해보지 않으셨다면 아래 Sean McQuillan @objcode의 영상을 보시기 권해드립니다.
위의 영상에서 볼수 있듯 ConstraintLayout과 TransitionManager를 통해 애니메이션을 만드는 쉬운 방법을 제공합니다. 이런 기본적인 아이디어를 바탕으로 MotionLayout은 개념을 훨씬 확장하게 됩니다.
MotionLayout?
MotionLayout은 레이아웃 전환과 복잡한 모션을 쉽게 제어하기 위해 만들어졌다. 버튼이나 타이틀처럼 사용자와 상호 작용하는 UI 요소의 위치와 크기를 입력에 따라 바꿔야 할 때 특히 유용하다. 단순한 애니메이션이라면 기존 Android 프레임워크가 제공하는 다음 방법도 사용할 수 있다.
- Animated Vector Drawable
- Property Animation
- LayoutTransition
- TransitionManager
- CoordinatorLayout
MotionLayout은 기존 애니메이션 방식과는 전혀다릅니다. 이름에서도 알 수 있듯 레이아웃이며 이에따라 요소들을 배치할 수 있습니다. 실제로 ConstraintLayout을 상속한 하위클래스로 풍부한 레이아웃 기능을 기반으로합니다.
Property Animation + TransitionManager + CoordinatorLayout = MotionLayout
두 레이아웃 사이의 전환에 있어 최상위 레이아웃 뿐만 아니라 하위 레이아웃 속성에 애니메이션을 적용할 수 있습니다. 또한 CoordinatorLayout과 같이 애니메이션의 포지셔닝을 마음대로 조절가능합니다. 터치 핸들링과 키프레임을 지원함으로 자신의 필요에 맞게 쉽게 전환 효과를 정의 할 수 있습니다.
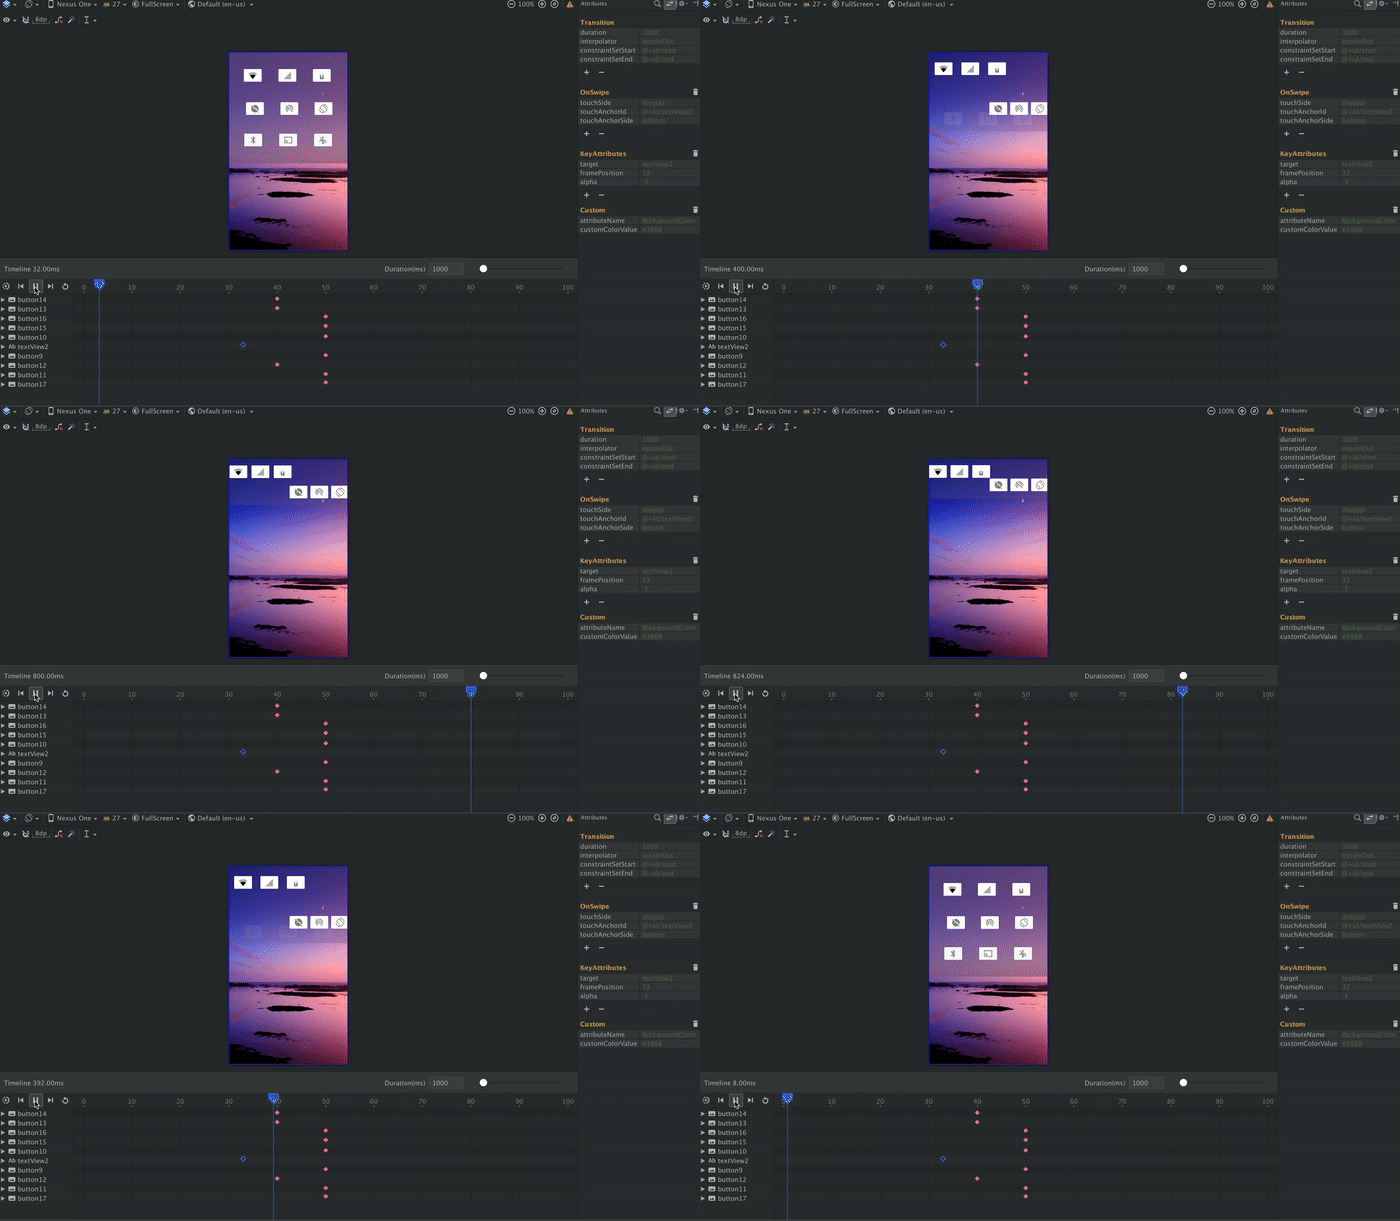
MotionLayout은 전혀 코드가 필요하지 않고 xml로 완벽하게 작동할 수 있게 합니다. 이렇게 코드와 디커플링됨에 따라 Android Studio에서 xml을 보여주는 훌륭한 그래픽 도구를 제공할 수 있을 것으로 보입니다.
 |
마지막으로 MotionLayout을 지원하는 ConstraintLayout 2.0에서는 API 레벨 14(ICS) 부터 서포트 라이브러리를 통해 사용할 수 있습니다. 이는 현재 안드로이드 기기의 99.8%를 지원하는 수준입니다.
MotionLayout 프로젝트에 추가
Gradle file:
dependencies {
    implementation 'com.android.support.constraint:constraint-layout:2.0.0-alpha2'
}
MotionLayout 사용
Layout file:
<android.support.constraint.motion.MotionLayout .../>
MotionScene
MotionLayout은 일반적인 레이아웃과는 달리 res/xml 디렉토리에 저장되는 별도의 xml파일인 MotionScene에 속성을 정의합니다. 여기에는 애니메이션을 지정하는 필요한 Transition 처리, 키 프레임, 터치 처리등의 요소들이 포함됩니다.
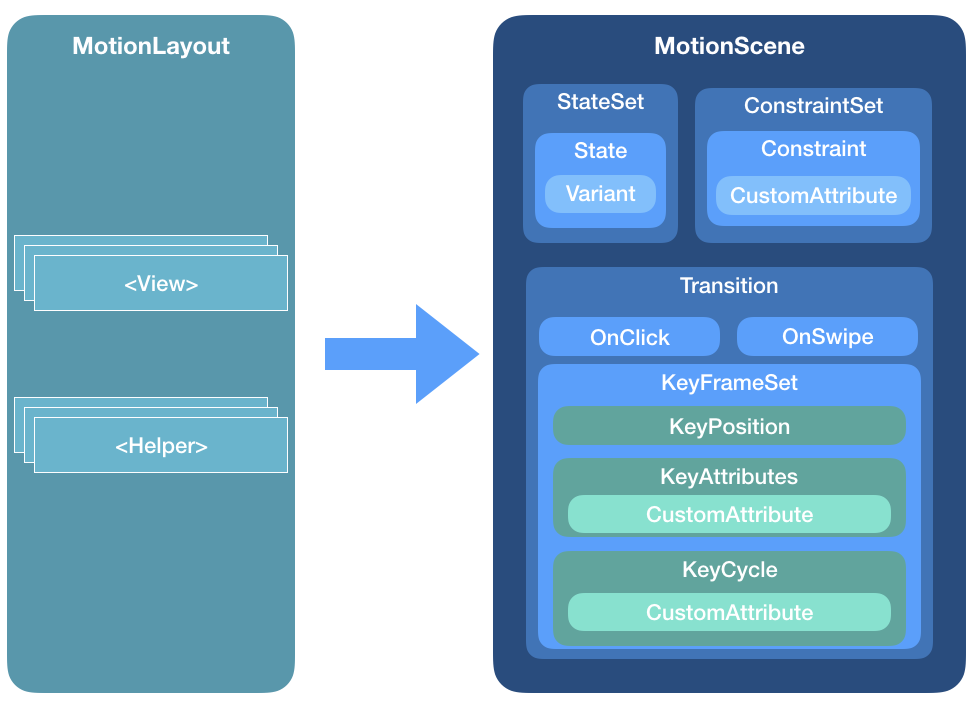
기존 ConstraintSet을 이용한 방식을 MotionLayout에 적용
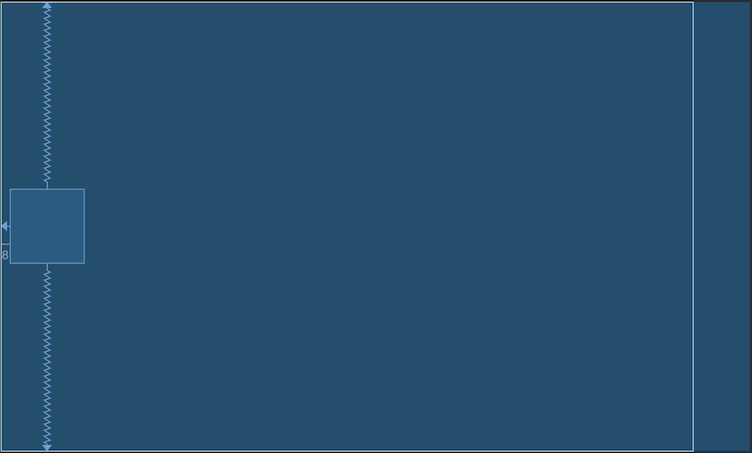
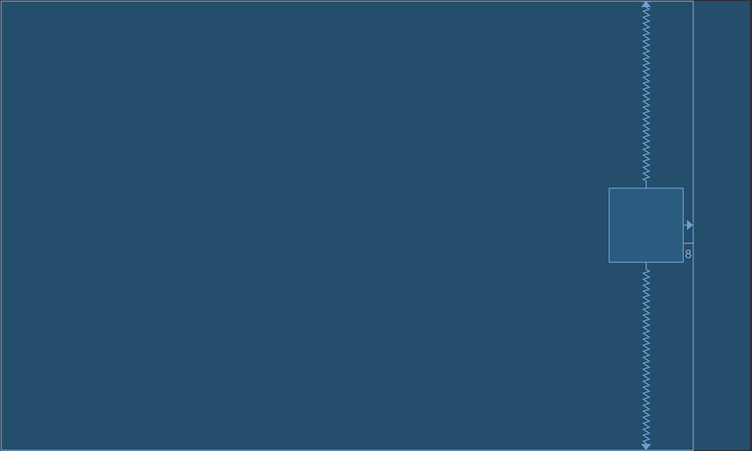
첫 번째 ConstraintSet에는 위젯을 화면 왼쪽에, 두 번째 ConstraintSet에는 오른쪽에 배치해 좌우로 전환하는 예제를 살펴보겠다. TransitionManager를 사용하면 이 변화를 애니메이션으로 표현할 수 있다.
- 화면 왼쪽에 위젯 배치
<android.support.constraint.ConstraintLayout xmlns:android="http://schemas.android.com/apk/res/android"
    xmlns:tools="http://schemas.android.com/tools"
    xmlns:app="http://schemas.android.com/apk/res-auto"
    android:layout_width="match_parent"
    android:layout_height="match_parent">

    <View
        android:id="@+id/button"
        android:background="@color/colorAccent"
        android:layout_width="64dp"
        android:layout_height="64dp"
        android:layout_marginStart="8dp"
        android:text="Button"
        app:layout_constraintBottom_toBottomOf="parent"
        app:layout_constraintStart_toStartOf="parent"
        app:layout_constraintTop_toTopOf="parent" />

</android.support.constraint.ConstraintLayout>
 |
- 화면 오른쪽에 위젯 배치
<android.support.constraint.ConstraintLayout xmlns:android="http://schemas.android.com/apk/res/android"
    xmlns:tools="http://schemas.android.com/tools"
    xmlns:app="http://schemas.android.com/apk/res-auto"
    android:layout_width="match_parent"
    android:layout_height="match_parent">

    <View
        android:id="@+id/button"
        android:background="@color/colorAccent"
        android:layout_width="64dp"
        android:layout_height="64dp"
        android:layout_marginEnd="8dp"
        android:text="Button"
        app:layout_constraintBottom_toBottomOf="parent"
        app:layout_constraintEnd_toEndOf="parent"
        app:layout_constraintTop_toTopOf="parent" />

</android.support.constraint.ConstraintLayout>
 |
ConstraintLayout을 사용하면 두 개의 레이아웃을 ConstraintSet을 이용하여 서로 전환할 수 있습니다. TransitionManager를 사용하는 경우 전환 애니메이션으로 표시됩니다. 이 방식의 문제는 전환이 시작되면 중도에 중단할 수 없다는 것에 있습니다. 전환시 특정 지점으로 이동하도록 지원하지 않기 때문에 사용자와의 상호작용할 수 없습니다.
MotionLayout은 이런 모든 문제를 해결 할 수 있습니다. 이를 위해 기존의 2개의 레이아웃을 이용하여 MotionLayout을 통해 자동으로 초기화 하는 방식으로 바꿔보겠습니다.
<android.support.constraint.motion.MotionLayout xmlns:android="http://schemas.android.com/apk/res/android"
    xmlns:app="http://schemas.android.com/apk/res-auto"
    xmlns:tools="http://schemas.android.com/tools"
    android:id="@+id/motionLayout"
    android:layout_width="match_parent"
    android:layout_height="match_parent"
    app:layoutDescription="@xml/scene_01"
    tools:showPaths="true">

    <View
        android:id="@+id/button"
        android:layout_width="64dp"
        android:layout_height="64dp"
        android:background="@color/colorAccent"
        android:text="Button" />

</android.support.constraint.motion.MotionLayout>
레이아웃 inflate시 MotionScene은 @xml/scene_01파일을 참조하게 됩니다.
<MotionScene
    xmlns:motion="http://schemas.android.com/apk/res-auto">

    <Transition
        motion:constraintSetStart="@layout/motion_01_cl_start"
        motion:constraintSetEnd="@layout/motion_01_cl_end"
        motion:duration="1000">
        <OnSwipe
            motion:touchAnchorId="@+id/button"
            motion:touchAnchorSide="right"
            motion:dragDirection="dragRight" />
    </Transition>

</MotionScene>
scene_01은 전환에 사용할 ConstraintSet 시작(motion_01_cl_start)/종료(motion_01_cl_end) 레이아웃을 지정할 수 있습니다. 또한 핵심인 onSwipe는 전환에 있어 핸들러를 지정했음을 주목해야합니다.
OnSwipe
OnSwipe 핸들러는 사용자의 액션이 일치되는 경우 전환을 시작합니다.
주요 속성
touchAnchorId추적해야 할 대상 (@+id/button)touchAnchorSide손가락을 추적해야하는 물체의 측면 (right/left/top/bottom)dragDirection추적중인 동작의 방향 (dragRight/dragLeft/dragUp/dragDown)
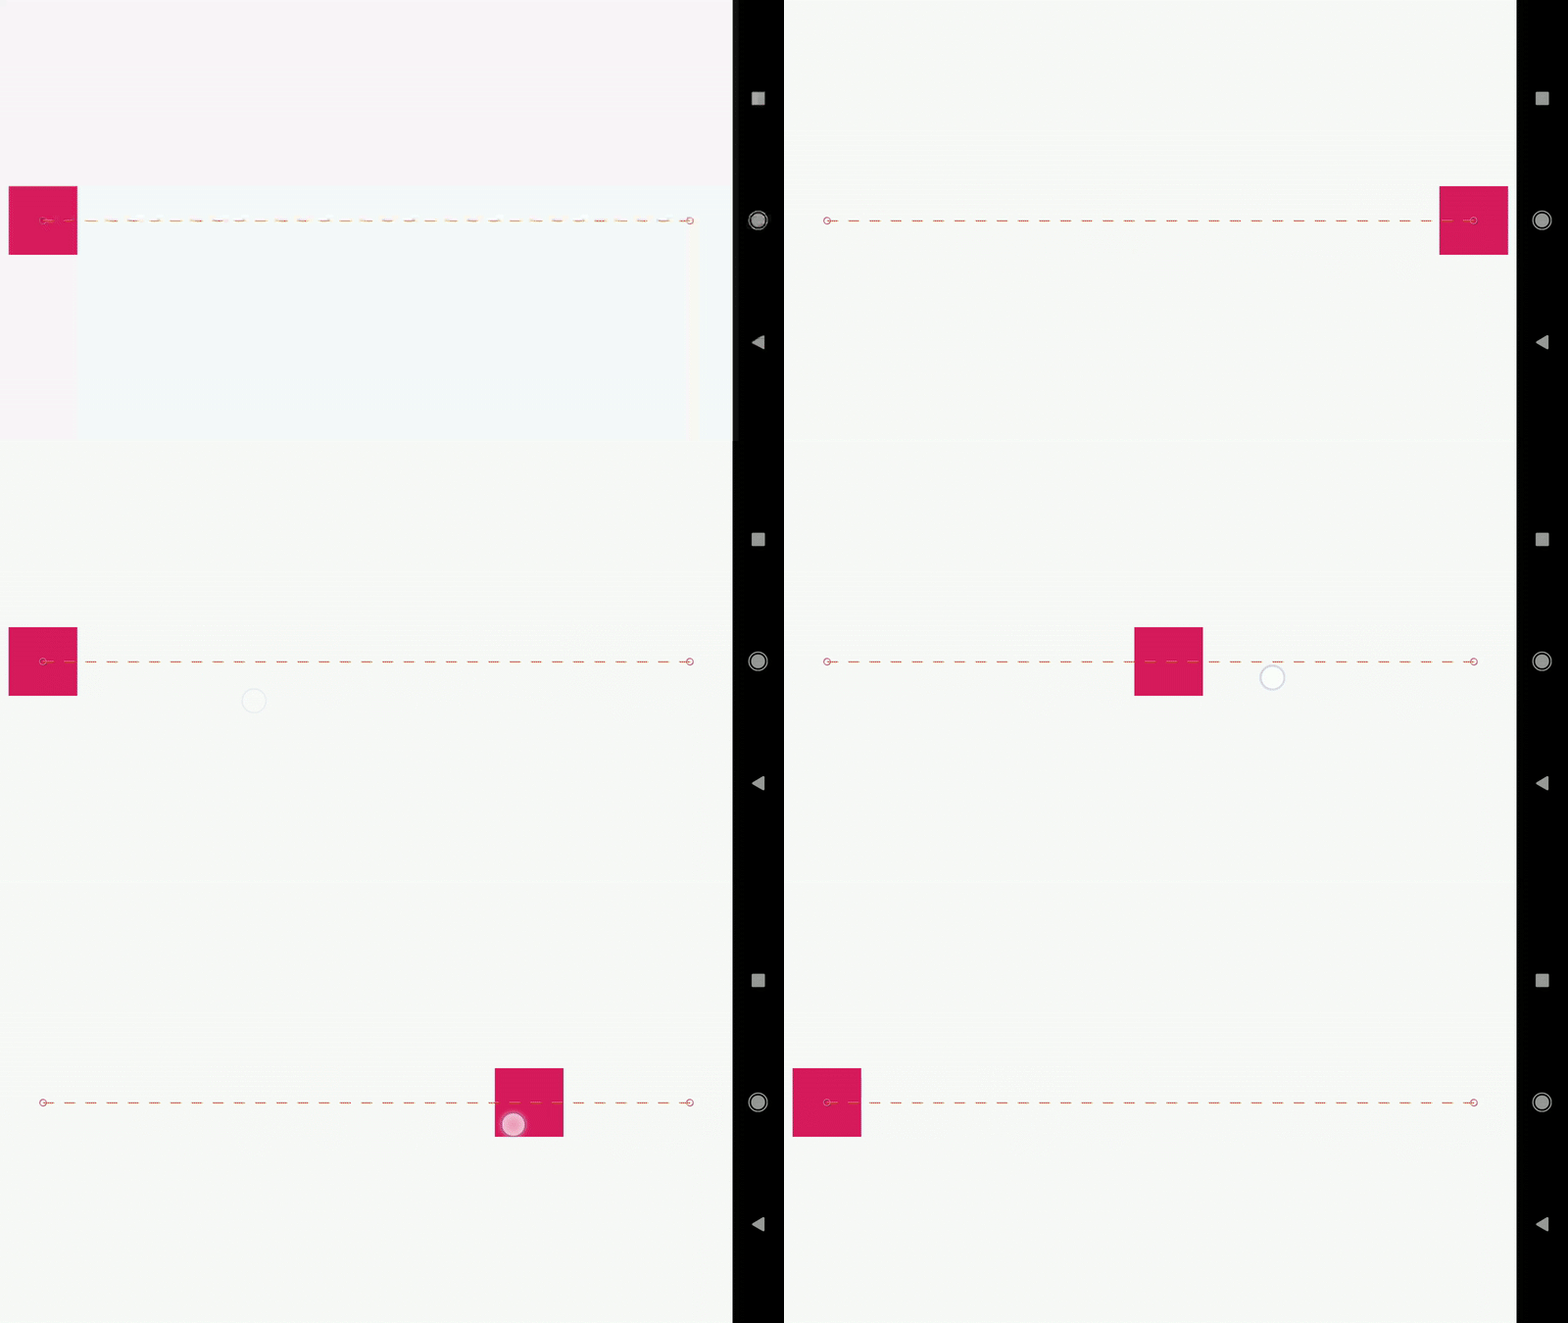 |
이제 코드 한 줄 없이 사용자의 스와이프 이벤트를 통해 네모박스가 자연스럽게 애니메이션되면서 끝에서 끝으로 이동 합니다.
MotionLayout 자체로 MotionScene 구현
위의 예제 ConstraintSet을 사용하여 2개의 레이아웃으로 전환하였으나 이번에는 MotionLayout으로만 사용하여 빠르게 레이아웃을 수성하도록 해보겠습니다.
MotionLayout은 res/xml 디렉토리에 있는 MotionScene 파일에서 ConstraintSet을 직접 설정하는 기능을 지원합니다. 이는 ConstraintSet을 사용하기 위한 다양한 레이아웃 생성을 하지 않아도 되는 장점이 있습니다. 이는 코드와 별도로 동작하기 때문에 나중에 Android Studio에서 모션레이아웃 뷰어를 지원할 가능성이 높습니다.
MotionLayout의 속성
- alpha
- visibility
- elevation
- rotation, rotation[X/Y]
- translation[X/ Y/Z]
- scaleX/Y
첫 번째 예제에서 사용한 ConstraintLayout 대신 MotionLayout으로 레이아웃을 다시 구성했다.
<android.support.constraint.motion.MotionLayout
    xmlns:android="http://schemas.android.com/apk/res/android"
    xmlns:tools="http://schemas.android.com/tools"
    xmlns:app="http://schemas.android.com/apk/res-auto"
    android:id="@+id/motionLayout"
    app:layoutDescription="@xml/scene_02"
    android:layout_width="match_parent"
    android:layout_height="match_parent">

    <View
        android:id="@+id/button"
        android:background="@color/colorAccent"
        android:layout_width="64dp"
        android:layout_height="64dp"
        android:text="Button" />

</android.support.constraint.motion.MotionLayout>
첫 번째 예제에서는 constraintSetStart와 constraintSetEnd에 @layout을 지정했지만, 여기서는 MotionScene 안에 정의한 ConstraintSet의 @id를 지정한다.
<MotionScene xmlns:android="http://schemas.android.com/apk/res/android"
    xmlns:motion="http://schemas.android.com/apk/res-auto">

    <Transition
        motion:constraintSetStart="@+id/start"
        motion:constraintSetEnd="@+id/end"
        motion:duration="1000">
        <OnSwipe
            motion:touchAnchorId="@+id/button"
            motion:touchAnchorSide="right"
            motion:dragDirection="dragRight" />
    </Transition>

    <ConstraintSet android:id="@+id/start">
        <Constraint
            android:id="@+id/button"
            android:layout_width="64dp"
            android:layout_height="64dp"
            android:layout_marginStart="8dp"
            motion:layout_constraintBottom_toBottomOf="parent"
            motion:layout_constraintStart_toStartOf="parent"
            motion:layout_constraintTop_toTopOf="parent" />
    </ConstraintSet>

    <ConstraintSet android:id="@+id/end">
        <Constraint
            android:id="@+id/button"
            android:layout_width="64dp"
            android:layout_height="64dp"
            android:layout_marginEnd="8dp"
            motion:layout_constraintBottom_toBottomOf="parent"
            motion:layout_constraintEnd_toEndOf="parent"
            motion:layout_constraintTop_toTopOf="parent" />
    </ConstraintSet>

</MotionScene>
기존의 위젯은 Constraint로 모두 대체합니다. 속성 변경을 원하는 위젯만 Constraint를 지정해야 적용가능 합니다. 만약 10개의 위젯이 있는 레이아웃일 경우 2개만 애니메이션 처리하고 싶은 경우 MotionScene의 ConstraintSet은 해당 위젯에 대한 Constraint를 지정하면 됩니다.
MotionLayout 속성
app:layoutDescription="reference"예제에서 본것 처럼 MotionScene xml파일을 지정해야 합니다.app:applyMotionScene="boolean"MotionScene을 적용할지 여부를 지정합니다.app:showPaths="boolean"동작 경로를 표시합니다. (기본값= false). 릴리즈 빌드시 끄는것을 잊지마세요.app:progress="float"특정 위치의 진행 장면으로 이동합니다. (0~1)app:currentState="reference"레이아웃 초기화시 특정 ConstraintSet을 강제로 실행합니다.
이제 한 줄의 코드 없이 사용자 이벤트를 통한 상호작용과 부드러운 애니메이션을 처리를 할 수 있습니다.
위의 모든 예제 코드는 GitHub를 통해 보실 수 있습니다.